Wednesday, 21 December 2011

The Big Red Button

 Although I have a kill switch on the handle bar switch block I'm still having the big red kill button. The back cover plate has been cut from an old metal storage shelf , it also has the ignition on/off switch fuse and the 8g inertia switch mounted on the other side  

 Here is the rear view of the mounting plate showing the main isolator "Big Red Button" the 8 to 20g inertia switch, ignition switch and fuse holder. The "On" cct. has it's own 12 volt power supply operating the main contractor for the traction cct.


Basic cct diagram
 Rear of tank filled and sanded tread for primers


Thursday, 8 December 2011

Not much time but new stuff done


                                     Potbox, Hall effect and main contactor installed
                                                    Cable from original throttle
                                       Front disc calliper recon and installed
                          Headlight, original reinstalled, to damm dear for a new one
                           rear brake now cable operated with shortened clutch cable

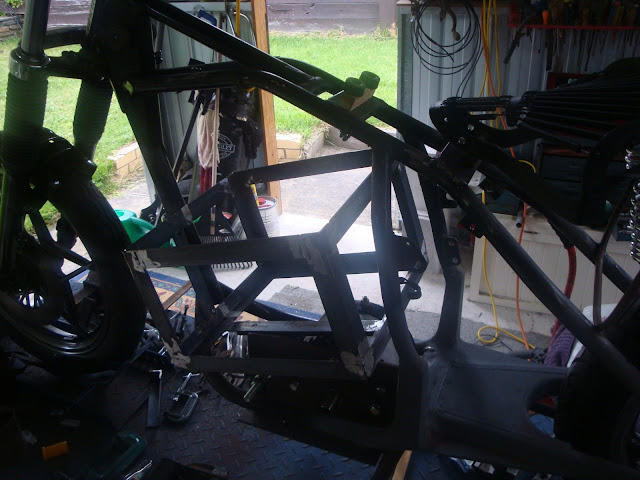
                             Fuel tank bottom cut out for weather proofing electrical gear

                                 First application of fibre glass to Finnish off end

                                           Looking up into cutaway tank on bike
                       Speedo and custom bracket from GN250 1982 Suzuki, GN was the single cylinder

Friday, 21 October 2011

Oh SH...T


After last night's electric vehicle club meeting I found a member who's converted a Lotus Elise to electric. He had laid down 25 of his 40+ Lithium batteries, to find out 12 of the 25, in the laid down position failed after a short time - nearly 50%. It appears the electrolyte can't come in contact with all the plates in the battery.  So I have nearly finished my battery frame, which has all 16 batteries laying down. So out with the grinder and chop! chop! chop! 


So the "dummy" packs for the batteries are no good, I'll just use a measuring tape


Again I can use the original engine mountings for the battery pack


There! That will have them all standing up like little soldiers. There was a good picture for the electrolyte and how it could not contact all the lithium "plates" when the cell was laid flat, I'll try and get this.
\

Saturday, 15 October 2011

Spex

Someone has
asked for a specification / parts list so here it is


Item
Description
Cost Au $
Weight  Kgs
Size
Alltrax  AXE4834 DC Motor Controller
24-48V 300A, for Series and PM motors
$415
2.9
195 x 146 x 71
Motenergy ME0708
48V Brushless DC Motor, 6-12kW
450
15
149 D x150
Thunder Sky LFP060AHA
LiFePO4 Cell 3.2V 60Ah Pack of 16
1360
34.5
61 x 114 x 203  915
battery charger Kingpan KP4810EL(600W)
LiFePO4 Cell 3.2V 100Ah 48V 10A switchmode
225
3
220x120x70
HWZ Series DC/DC Converter
48V to 13.5V 25A
149
2
200 x 140 x 72
BMS-CM160-V6
LFP100AH BMS Cell Module x 15
195
0.225
n/a
BMS-MCU-EV2
Single channel Master Unit for Evs
179
2
170 x 100 x 75
ZJW200A Contactor
200A rated contacts, 12V coil
49
0.9
n/a
Precharge Resistor
1kohm 10W resistor with 3/8in ring terminals
4.5
0.05
n/a
ANN Fuse, 400A
For low voltage circuits (72VDC max)
13.5
0.1
n/a
Inertia Switch
Vehicle crash sensor, 8-14G
22.5
0.06
n/a
250A Emergency Disconnect Switch
Big Red Button, 250A continuous
26.5
0.5
n/a
Power Cable, 25mm² Orange
Double insulated, sold by the metre x 3mtrs
19.5
0.9
n/a
$3,109
62.135

Dummy battery packs


Photos showing mock ups of the battery pack size required to make sure all will fit.


Total of 16 60 amp hour lithium batteries stacked on the their side, each individual battery has the dimensions 203mm x 114mm x 61mm


This shows there will be 3 stacks arranged vertically. two stacks will have 6 cells and the smaller stack at the back will have 4 cells 


The foam block at the base shows the size of the Altrax controller


Thursday, 29 September 2011

Engine Mounting plate finished

                 
              A quick bend and tack frame for the seat springs so I can work out the foot rest locations


                    3.2 mm recess should fit snugly around motor collar, this will take the main                                                torque of the motor, not the mounting bolts

                                                               
                                                                     nice fit, Sweet


                                                  Showing motor snug fit into recess


                              Mounting Plate bolted to frame using existing engine mounting holes


Ah the good old "V" block from my first year apprenticeship, (1978!) clamped and squared up with lower "Bash" plate


                                      A couple of tack welds to hold things together


         Right hand support bolted to existing frame mount ( will be cut to length), tack welded


    A flash new replica fibreglass Ducati 850 rear fender. Thanks Classic Cyberglass click below for more info


                       and where would I be with out fasteners from Aberfoyle Park Mitre 10 ?