Friday, 2 March 2012

The small jobs are really the BIG jobs


Timber for the base of the battery box I think it may be close to being finished


Secured in 


Dome nuts


Finely the shunt arrives and mounted to the acrylic, I made up 2 BUS bars to connect the fuse with the shunt 


From the side 


Battery box bolted back into the frame with Pot box and main contactor 


Put 50mm lugs on the connectors to check cable won't interfear or fowl when in place


Wednesday, 22 February 2012

Here come the Parts

Great to get the new Sprockets Key way and Acrylic for mounting fuse and soon to arrive 300 amp shunt


Old sprockets, Rear 47 tooth front 14 tooth, New rear 56 front 11. Hold on I here you say, shouldn't the ratio be 6:1 ? Yes however these sprockets were standard sizes  the machine shop carry and just require the additional machining to fit the motor and rear wheel.


New acrylic to mount T class fuse and when it arrives, 300 amp shunt. This will place all of the ignition in the one spot making for compact / less wiring.


 Rear view


Just an extra little engine mounting.


Wednesday, 15 February 2012

The Waiting Game

Been a long time since the last post but I'm playing the waiting game, Waiting for "T" class fuse , DC shunt and having sprockets made. Well the T class fuse arrived today and hopefully the rest with in the next 10 days. But a small problem, did you see it? where does the chain run? Well I'll have to remake this piece.


Now for a relocation of the ignition key


 Thats the T class fuse next to the red button Thats a $68 insurance policy for the battery pack.


Now that's cable


Thursday, 19 January 2012

Fiddly Sparks


Great Black and white shot from daughter Courtenay, ta.


Running Cabling through frame rail to hide, the tank will cover,


Cable exit for rear electrics, will be covered by number plate bracket . Rear indicator in place.


Right hand rear indicator


Very handy

Below me trying to look cleaver while Courtenay took some shots

Saturday, 14 January 2012

Youtube Summary


This is a short version with super cool new wave music from 1977

Cheers, Rob
3663

The Fiddly Bits


Indicator wires drilled into headlight nacelle and sealed will rubber gromits  


Rear guard bracket again with rubber gromits in the guard to reduce stress on the fibre glass


Bracket bolted to frame, still to be trimmed to shape


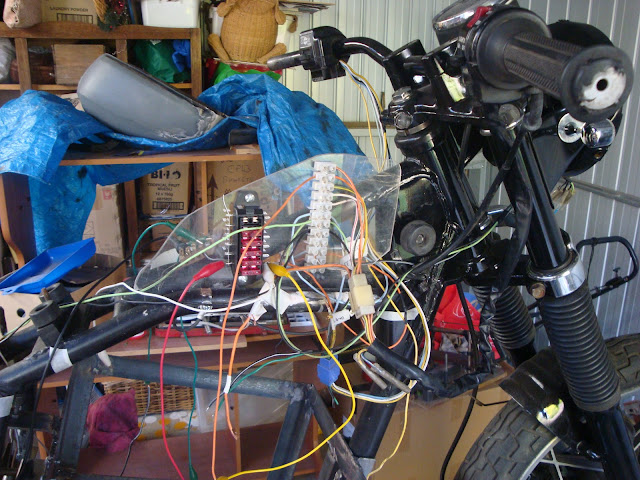
Oh yeh the birds nest, don't panic I'm picking up new wire for a new loom this Wednesday at the electric car club. 


For interest here is association bumper sticker giving the wed address. Check it out I believe they have been going for nearly 30 years


Lower bracket for guard. My wife tells me I don't include enough distance shots of the bike or enough information when I update. So next update, in about a 4 days will include more distant shots of the bike and for information, well I'm more of  a visual kind of person. 

Tuesday, 3 January 2012

Begin the wiring up


  Charge plug fits nicely into fuel cap using standard Plumbing fixings, The cap hinges and makes a nice air/weather tight seal. For interest sake the tank's from a 1972/3 Honda CB 350 


4 "idiot" lights mounted in tank, from top, Blue-High Beam, Orange-Indicator, Green-On, Red-Charging. I have a micro switch which will open circuit the ignition circuit while charging. 


Bottom tray which will be riveted on and sealed with a silicon sealer as this area needs to be water tight to house the controller.   


Ear rings! no LED indicators 


 Office coming together


Perspex mounting board for the beginning of wiring, I hope it's as easy as the leg bone connects to the hip bone!
I
Just showing the earthing common connector and earthing wires to the frame.